
Planning an alternative bridal shower or a Halloween-themed celebration requires a design approach that steps away from traditional pastels and rigid calligraphy. The Spooky Bachelorette Font package delivers exactly that by pairing a whimsical handwritten script with a collection of hand-drawn decorative elements. Designers, print-on-demand shop owners, and craft hobbyists often search for typefaces that capture a specific mood without forcing them to layer multiple files manually. This bundle gives you a ready-to-use system for ghostly gothic romance themes, saving hours of layout work while keeping your creative process flexible.
What makes this typeface different from standard wedding scripts?
Most wedding typography relies on perfect loops or sharp serifs, but alternative celebrations need character with a slight edge. This script features playful, irregular letterforms that mimic natural handwriting while maintaining excellent legibility. The organic flow works especially well when you want a relaxed, approachable feel for party invitations, custom signage, or hangover recovery kits. If you usually prefer slightly uneven, sketchy brush styles for your projects, you might also explore these playful line alternatives for similar textural variety. Pairing the main script with a cleaner typeface, like the ones found in the modern minimalist directory, creates a balanced layout that keeps your event messaging clear and visually engaging.
How do the included graphics fit into crafting and commercial projects?
The real value of this download lies in the 33 matching clipart illustrations that accompany the letters. You get ready-made elements like a skeleton bride, ghost martini, wedding rings, dice, and a vintage disco ball. Because each graphic is provided as a high-resolution PNG with transparent backgrounds, you can drop them directly into templates without spending time masking edges. Small business owners and POD sellers can print these on stickers, tote bags, or bridal party shirts knowing the 300 DPI resolution stays sharp even at larger sizes. For digital planners or web graphics, the separate SVG files offer infinite scaling, while the single combined EPS file streamlines vector editing. When you need a polished, flowing alternative to pair with these quirky illustrations, browsing options like the elegant looping typefaces library can help you find complementary accents that match your brand palette.
Which file formats should you use for different design workflows?
Choosing the right file type depends entirely on your software and final output. Install the OTF or TTF files when working in layout programs to type custom text directly on your canvas. Switch to PNG when preparing files for heat presses or direct-to-garment printing, as raster formats handle color details more reliably on fabric. Crafters using cutting machines will want to rely on the individual SVG files to trace cut lines for iron-ons, vinyl decals, or acrylic party props. Many designers appreciate how the bundled clipart reduces the need for extra stock subscriptions. If you typically lean toward sweeter, rounded scripts for other seasonal projects, checking out the soft seasonal scripts set provides a useful contrast to this darker aesthetic.
Can you use these assets for client work and physical products?
Yes, the standard licensing covers personal use, digital templates, and physical merchandise sold by independent creators. Whether you are designing custom favor bags, event banners, or printable wall art, the assets scale cleanly and maintain crisp edges across different mediums. Print-on-demand platforms benefit most when you combine the script text with the pre-cut vector shapes, allowing for faster turnaround on seasonal collections. To verify current usage guidelines or find matching seasonal assets, you can always visit the Spooky Bachelorette Font page directly. Many creators also keep a few polished pairing options on hand, which is why the structured commercial options category remains a reliable backup when clients request something more traditional.
Quick steps to prepare your files before printing
Before sending your designs to a printer or uploading them to a merch platform, follow this simple workflow to avoid quality issues:
- Check your dimensions: Set your canvas to at least 300 DPI and match the final print size before placing the script text.
- Verify transparency: Open the PNG files in your editor to confirm the background is truly clear, not white.
- Outline your text: Convert font layers to outlines or paths before exporting to prevent missing-character errors on third-party printers.
- Save a master file in your native program, then export a flattened TIFF or high-quality JPG for your final delivery.
- Run a small test print on your chosen material to see how the ink absorbs before fulfilling bulk orders.
Start by mocking up your layout with one or two clipart pieces, adjust the kerning on your headings, and keep your color palette limited to three shades for the cleanest result.
Learn More Dark Pink Font for Bold and Creative Designs
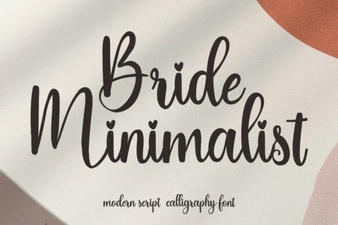 Minimalist Fonts for Wedding Stationery Design
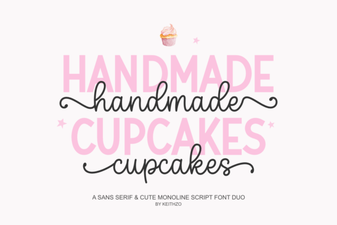 Fonts Inspired by Baking & Decorating Cupcakes
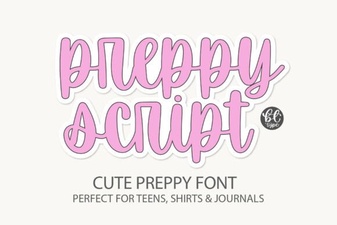 Preppyscript: Friendly Creative Font Styles
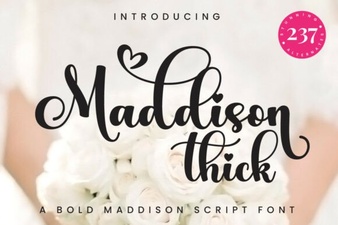 Creative Projects Using the Maddison Thick Font
 Veloura Font for Creative Projects