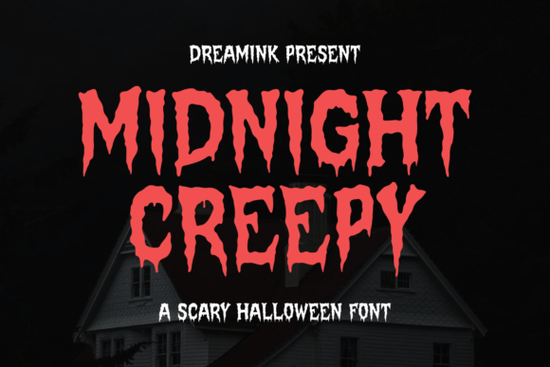
If you need a typeface that instantly sets a dark, unsettling mood, this midnight creepy typeface delivers exactly that. Designed with jagged, melting edges and a heavy, dripping flow, the lettering reads like it was pulled straight from a horror movie poster. It works best when you want your text to feel heavy, atmospheric, and unmistakably spooky. Whether you are designing Halloween merchandise, haunted event flyers, or seasonal print-on-demand products, the font’s bold structure ensures your message grabs attention without needing extra graphics.
What makes this Halloween typeface stand out?
The strength of this lettering lies in its intentional imperfections. Instead of clean, uniform strokes, each character features uneven drips and rough cuts that mimic liquid running down a surface. That texture gives your headlines a raw, hand-crafted horror vibe while keeping the letters highly legible at larger sizes. Because it is built as a display font, it performs best in short phrases, titles, and logo locks. You will notice that the heavy weight holds up well on both dark and light backgrounds, though it really pops when paired with deep blacks, muted purples, or blood-red accents.
Which projects work best with a horror display font?
This style shines when you keep the text short and let the letterforms do the heavy lifting. Here are a few practical applications that consistently convert well for crafters and small shops:
- Seasonal apparel: Short phrases on t-shirts, hoodies, and tote bags where the dripping effect becomes the main visual.
- Event signage: Haunted house tickets, escape room posters, and Halloween party invites that need an immediate thrill factor.
- Digital thumbnails: YouTube covers, podcast artwork, and social media banners for horror-themed content.
- Print-on-demand stickers: Die-cut designs where the jagged edges align perfectly with contour cut lines.
Keep your layouts simple. When a font already carries this much texture, adding busy backgrounds or extra decorative elements usually muddies the final result.
How do I pair it with other typefaces?
Bold horror lettering needs a clean supporting font to keep your design readable. Pair it with a straightforward sans serif for body copy, or try a structured outline style when you want a retro vibe. For example, you might combine it with a scholar block outline style to create a vintage cinema poster look, or use a kindly witch lettering when your project leans more toward playful Halloween crafting rather than pure horror. If you are building a merch collection, testing a racken display font for secondary headlines can give your shop a cohesive seasonal theme without repeating the same heavy style on every product. Some designers also like to balance dark display lettering with a ryehouse script for subheadings that need a softer, hand-drawn contrast.
What should I check before downloading?
Always review the licensing terms before using any display typeface for commercial work. Most marketplace fonts include a standard desktop license for personal projects and small batches, but print-on-demand platforms and large retail runs often require an extended or commercial license. Check whether web embedding is allowed if you plan to use the font on a website header, and verify which file formats are included. You will typically receive OTF and TTF files, which install smoothly on Windows and Mac. If your design software supports ligatures or alternate glyphs, take a few minutes to explore the character map. Sometimes the most unsettling drips and swashes are hidden in the alternates panel.
If you want to browse similar seasonal typefaces or verify current pricing, you can search for Midnight Creepy Font directly on the marketplace. Checking the latest update notes also helps you spot new glyph additions or improved spacing that might save you time during layout.
How do I get the best print results?
Heavy, textured fonts can lose detail if your export settings are too low. Follow these quick steps to keep the drips sharp:
- Set your canvas to at least 300 DPI before placing any text.
- Convert the type to outlines or paths once your layout is finalized. This prevents substitution issues when sending files to a printer.
- Use a solid background or a subtle grain overlay. Busy textures will compete with the melting edges.
- Test a small print sample first. Dark inks on cotton or polyester sometimes spread slightly, which can soften the jagged cuts.
When you handle the file preparation carefully, the font maintains its raw, unsettling character all the way to the final product.
Quick next steps before you start designing: Verify your license tier for the intended sales channel, install both OTF and TTF versions to avoid software conflicts, map out your alternates for custom drips, pair the headline with a clean supporting typeface, and run a test print at full size. Once those basics are covered, you can focus on layout and let the lettering set the tone.
Learn More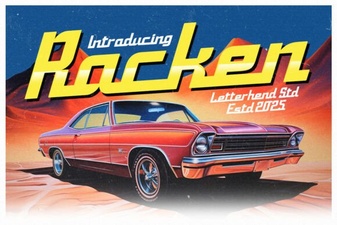 Discover the Racken Font: Design & Project Ideas
 Craft Your Vintage Designs with Velvety Font
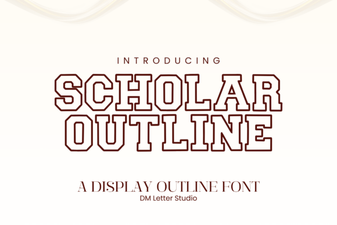 Scholar Font Design: Creative Outline Blocks
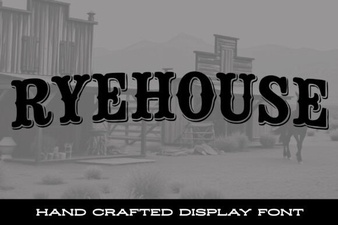 A Modern Font for Creative Web Design
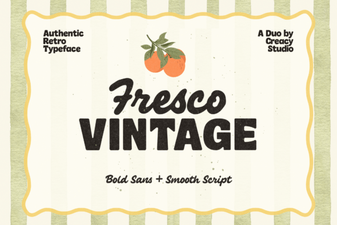 Fresco Vintage Duo Font for Creative Design Projects
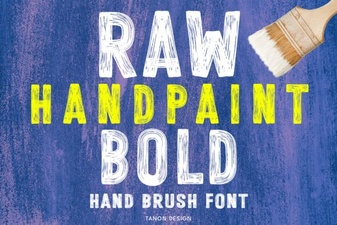 Hand Paint Bold Fonts: Design and Diy Projects